File Selector
Overview
Definition
The file selector component provides a drag-and-drop file upload interface with visual feedback for file selection, upload progress, and file status. The component allows users to upload one or more files from their device.
Live Demo
FileSelector


Anatomy
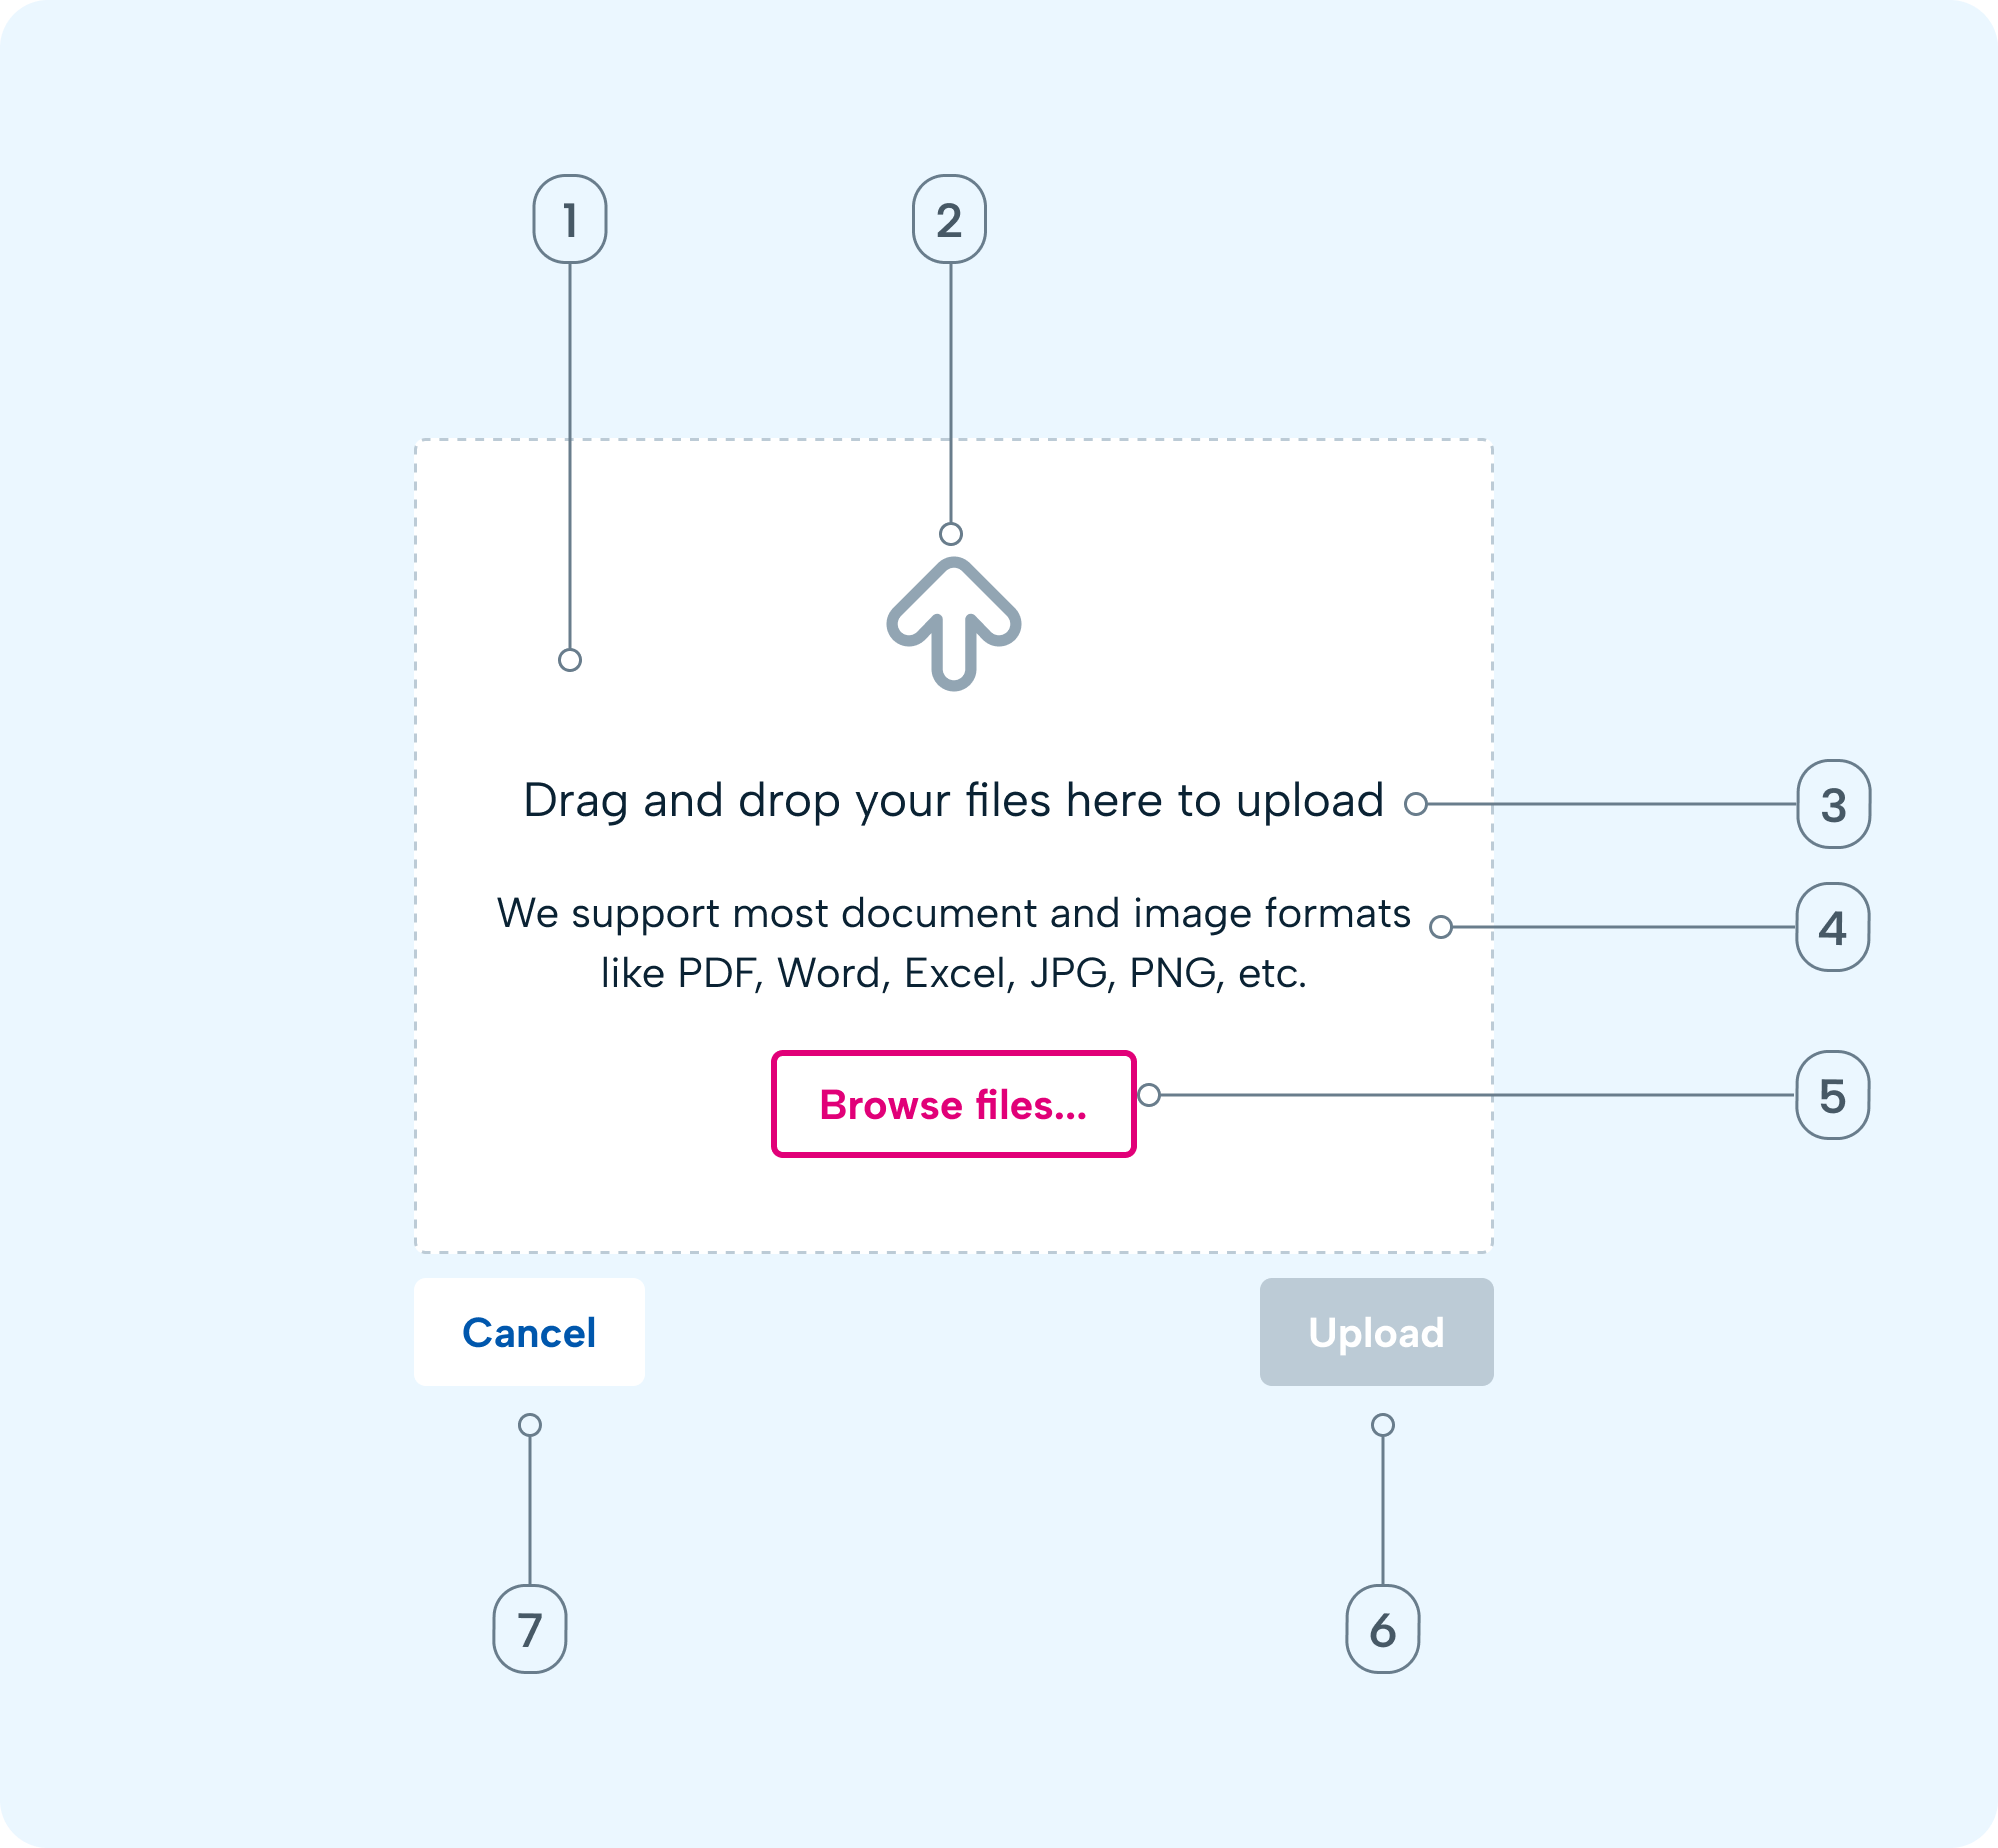
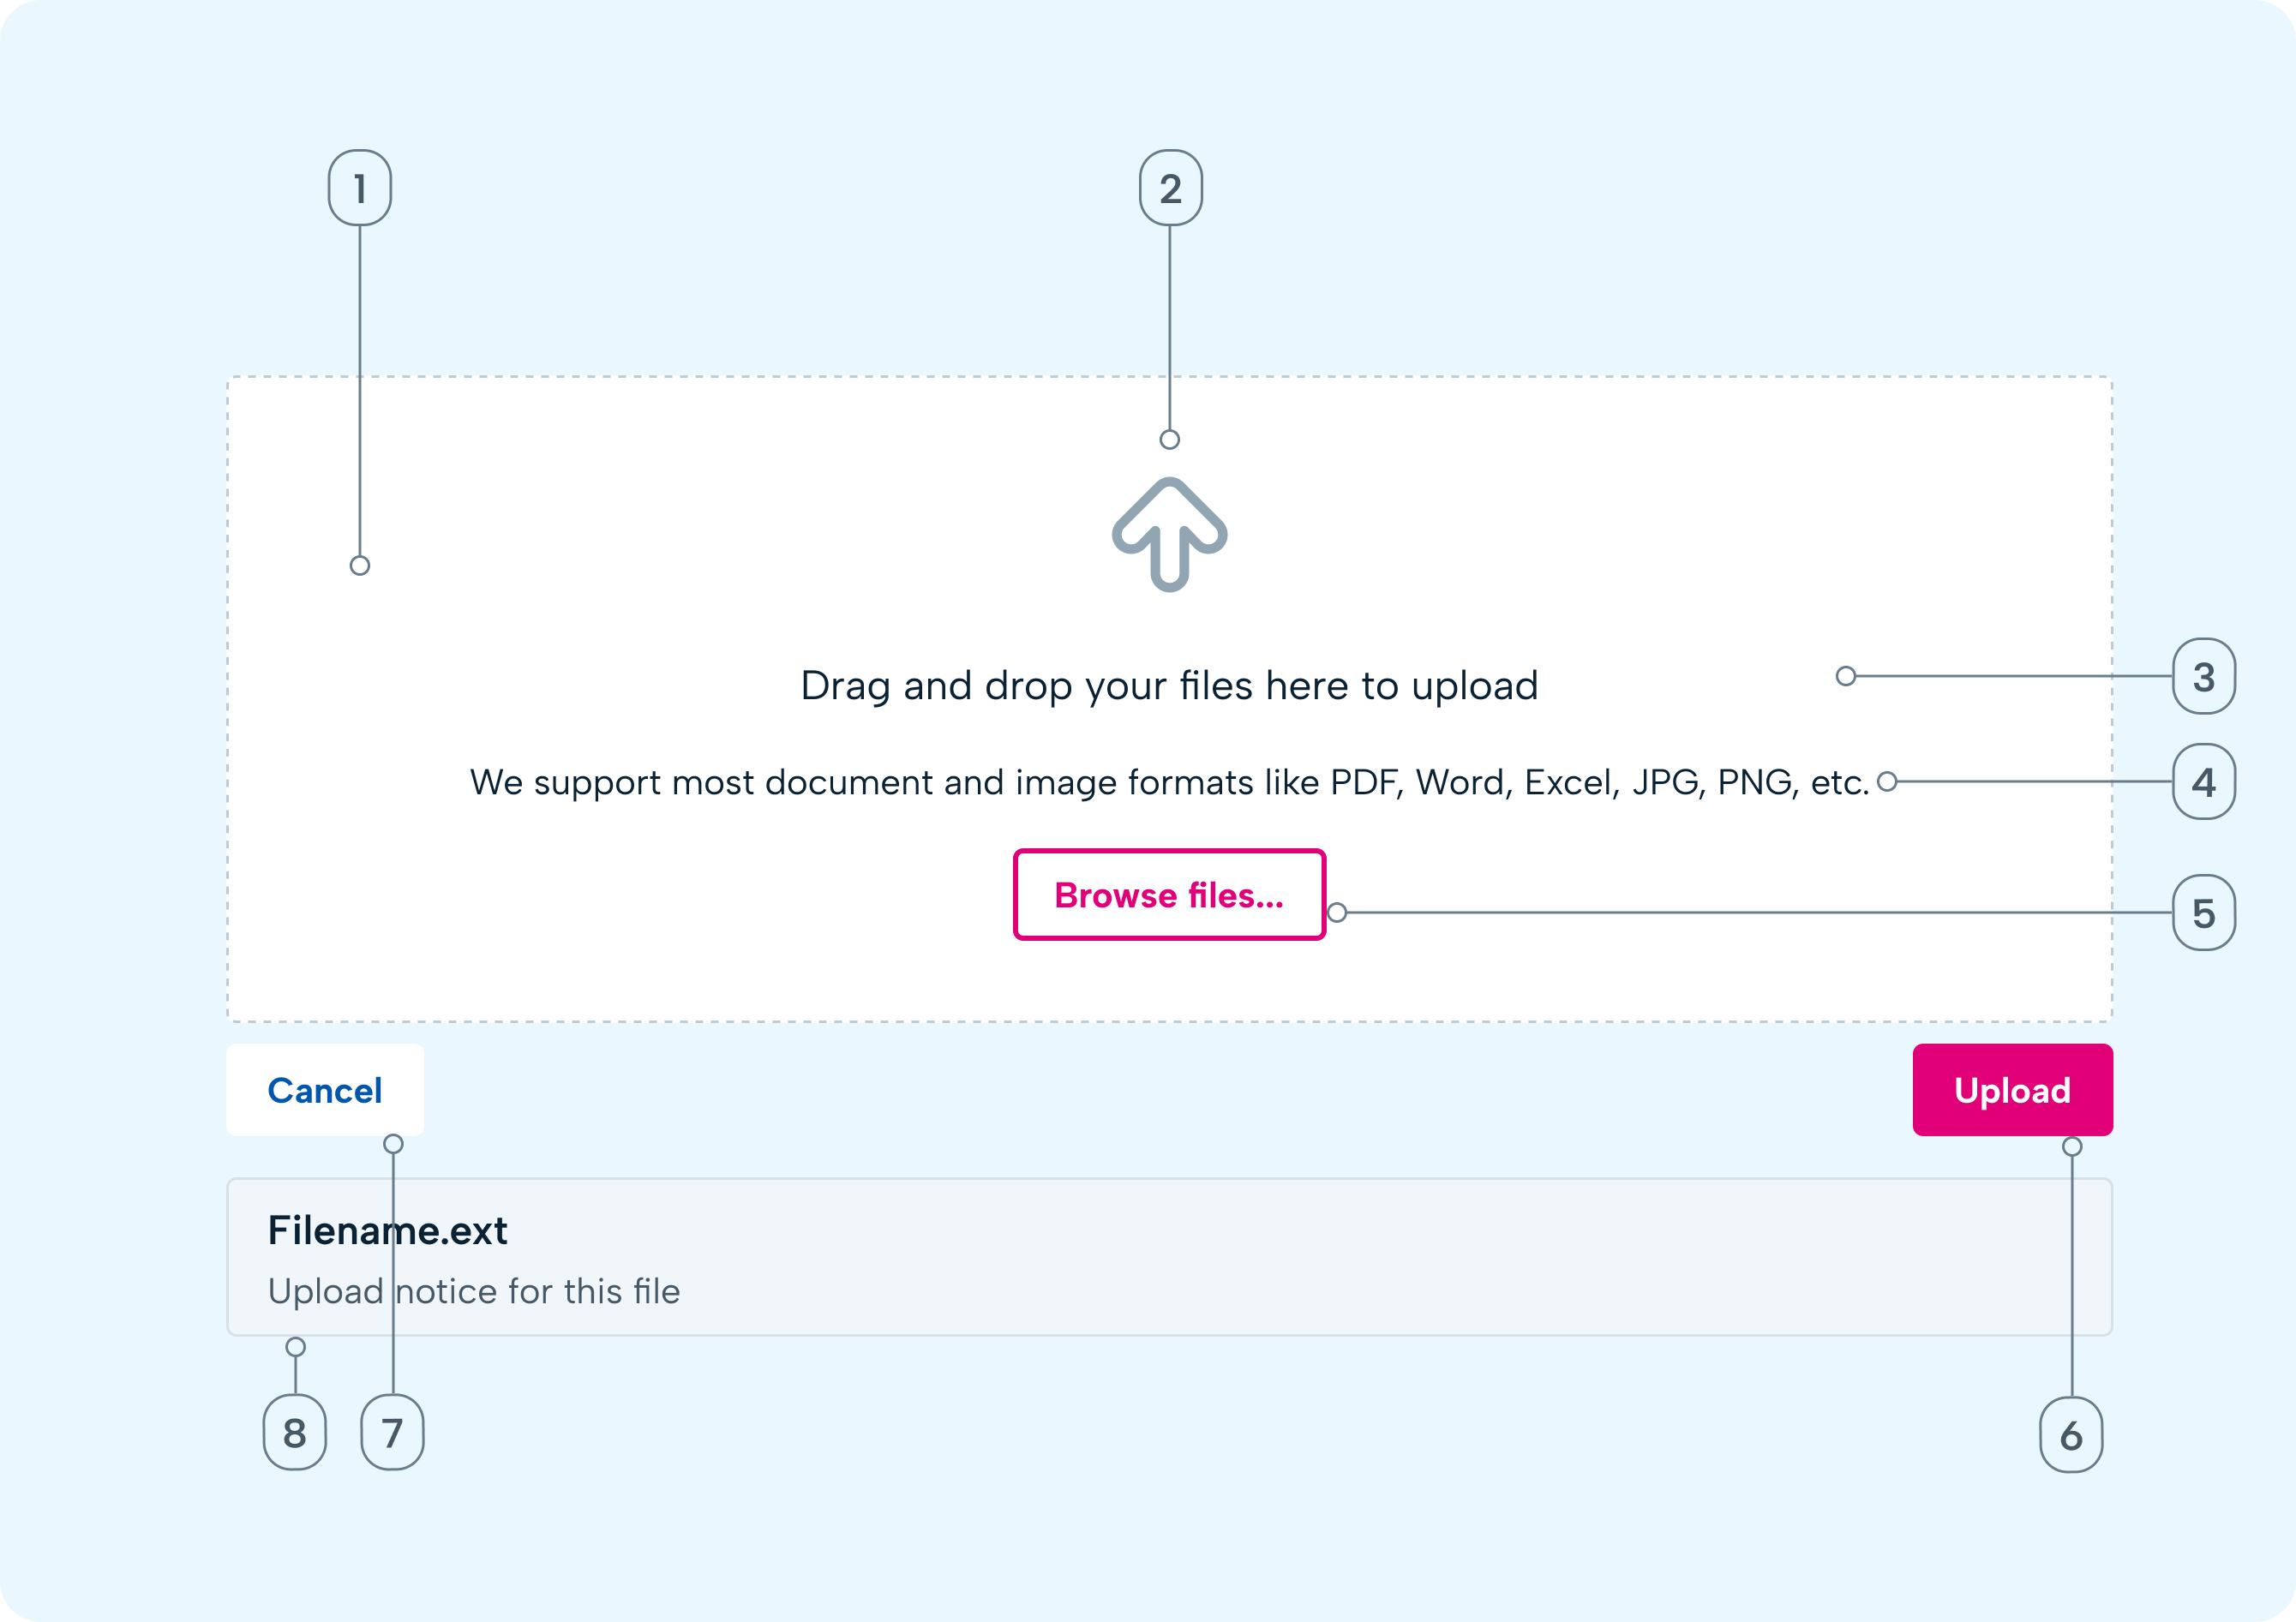
- Dropzone: Interactive container for drag-and-drop
- Upload Icon: A visual indicator upload icon (arrow pointing up)
- Hint text: Guidance text explaining how the control can be used
- Information text: Text content indicating to the user of the file extensions and types that are accepted.
- Browse button: An alternative file selection method which launches the file browser on the device.
- Upload button: provides explicit action to the user - can be interacted with once a file has been selected.
- Close button: Allows the user to cancel and close the file upload modal and abandon the task.
- File attached: Displaying the selected file to the user with a status to indicate whether the file type is accepted and ready to be uploaded.
Variants
File upload primary state
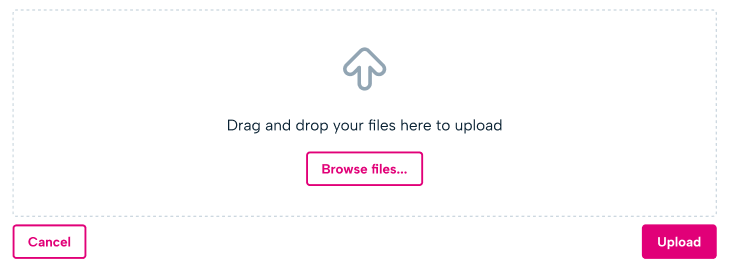
File attached secondary state
This is displayed when a file is attached to the modal and ready to be uploaded.

File information states
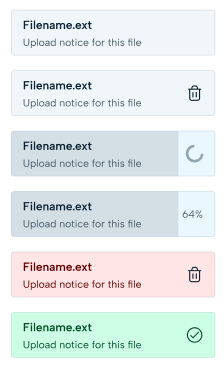
- Multiple files: users are able to upload multiple files at once to the **maximum size limit of 30MB. Each file should have a it's own status container.
- Bin icon: allows the user to individually remove files from the upload modal
- Spinner: indicates the progress of the file attaching to the upload modal.
- Progress percentage: indicates how far along the file upload is.
Colour states
- Neutral: used when the file meets accepted criteria and is ready for upload.
- Error: indicates to the user that file is not accepted. The file notice should clearly state why the file is not accepted. This should be used with a bin icon to allow the user to remove the unaccepted file from the modal.
example; file extension is not supported, the file size is too large or file limit reached
- Success: used where a file has either been in a spinner or progress state and is now completed and ready for upload.
Size
File upload area
Width: 360px - fixed
Height: 260px - hug
File attached snippet
Width: 277px - fixed
Height: 62px - hug
Icon: 24 X 24 px
Guidelines
When to use
- Use when the user should be able to add one or more than one file from their device.
When not to use
- If only one file is required, use the file input control instead.
Position
- The file uploader component appears centred on the screen, overlaying the current page content. This can be nested inside a modal component as a child element.
Behaviour
Trigger
The overlay is initiated when the user clicks 'Attach file" CTA on the previous screen. This actions signals the intent to upload a document or image related to workflow (employee profile, Documents, Employee Sickness)
The overlay appears in the background with component in the foreground and includes;
- Upload file component
- Dropzone
- 'Browse files' secondary CTA within the dropzone
- 'Upload' primary CTA in the footer of the component
- 'Cancel' tertiary CTA in the footer of the component
Interactions
- On dropping files in the dropzone - or confirming files to upload from the device file browser - a progress indicator should be shown.
- If one or more of the files fails to upload, an error panel should be shown near to the file selector.
Content
Hint text
- Use the default hint text unless you have a very distinct need to use something else.
Information text
- Text indicating to the user which file extensions and types are accepted.
Accessibility
- The "Browse" button must be available, in a sensible position in the tab order, and accept keyboard focus.
Screen reader compatibility
- All interactive elements (buttons, overlays, spinners, file inputs) use proper semantic tags / ARIA labels. This allows screen readers to announce the buttons and any warnings to users who rely on audio feedback.